EduContacts User Guide
EduContacts is a desktop app for educators in tertiary institutions in Singapore to manage contacts, optimized for use via a Command Line Interface[1] (CLI) while still having the benefits of a Graphical User Interface[2] (GUI). For expert users familiar with command-based tools, EduContacts can get your contact management tasks done faster than traditional GUI apps. For new users, EduContacts also includes user-friendly and intuitive features and guidance, making it user-friendly and accessible for all users.
- Guidance Icons Legend
- Quick start
- Features
- Viewing help :
help - Adding a person:
add - Listing all persons :
list - Adding a module to a person:
module - Editing a person :
edit - Adding a grade :
grade - Listing persons by certain attributes :
filter - Deleting a person/module :
delete - Finding a person:
find - Clearing all entries :
clear - Exiting the program :
exit - Saving the data
- Editing the data file
- Viewing help :
- FAQ
- Known issues
- Command summary
1. Command Line Interface: a software mechanism you use to interact with your operating system using your keyboard.
2. Graphical User Interface: a digital interface in which a user interacts with graphical components such as icons, buttons, and menus.
Guidance Icons Legend
Legend:
Tip: Helpful suggestions to improve your experience or maximize efficiency.
Note: Important information or details to keep in mind for correct usage.
Warning: Critical cautions to prevent errors, potential issues, or data loss.
Quick start
- Ensure you have Java
17or above installed in your computer. Download Java here if you haven't already.
Tip: After downloading, you can confirm installation by typing java -version in your command terminal.
Download the latest
.jarfile from here.Copy the file to the folder you want to use as the home folder for your EduContacts.
To run EduContacts, open a command terminal.
To navigate to the folder where you placed the
.jarfile, use thecdcommand. For example, if you placed the file in a folder namedEduContactson your desktop, you would enter:cd ~/Desktop/EduContactsand use the following command to run the application:
java -jar educontacts.jarA GUI similar to the screenshot below should appear in a few seconds. Note how the app contains some sample data.
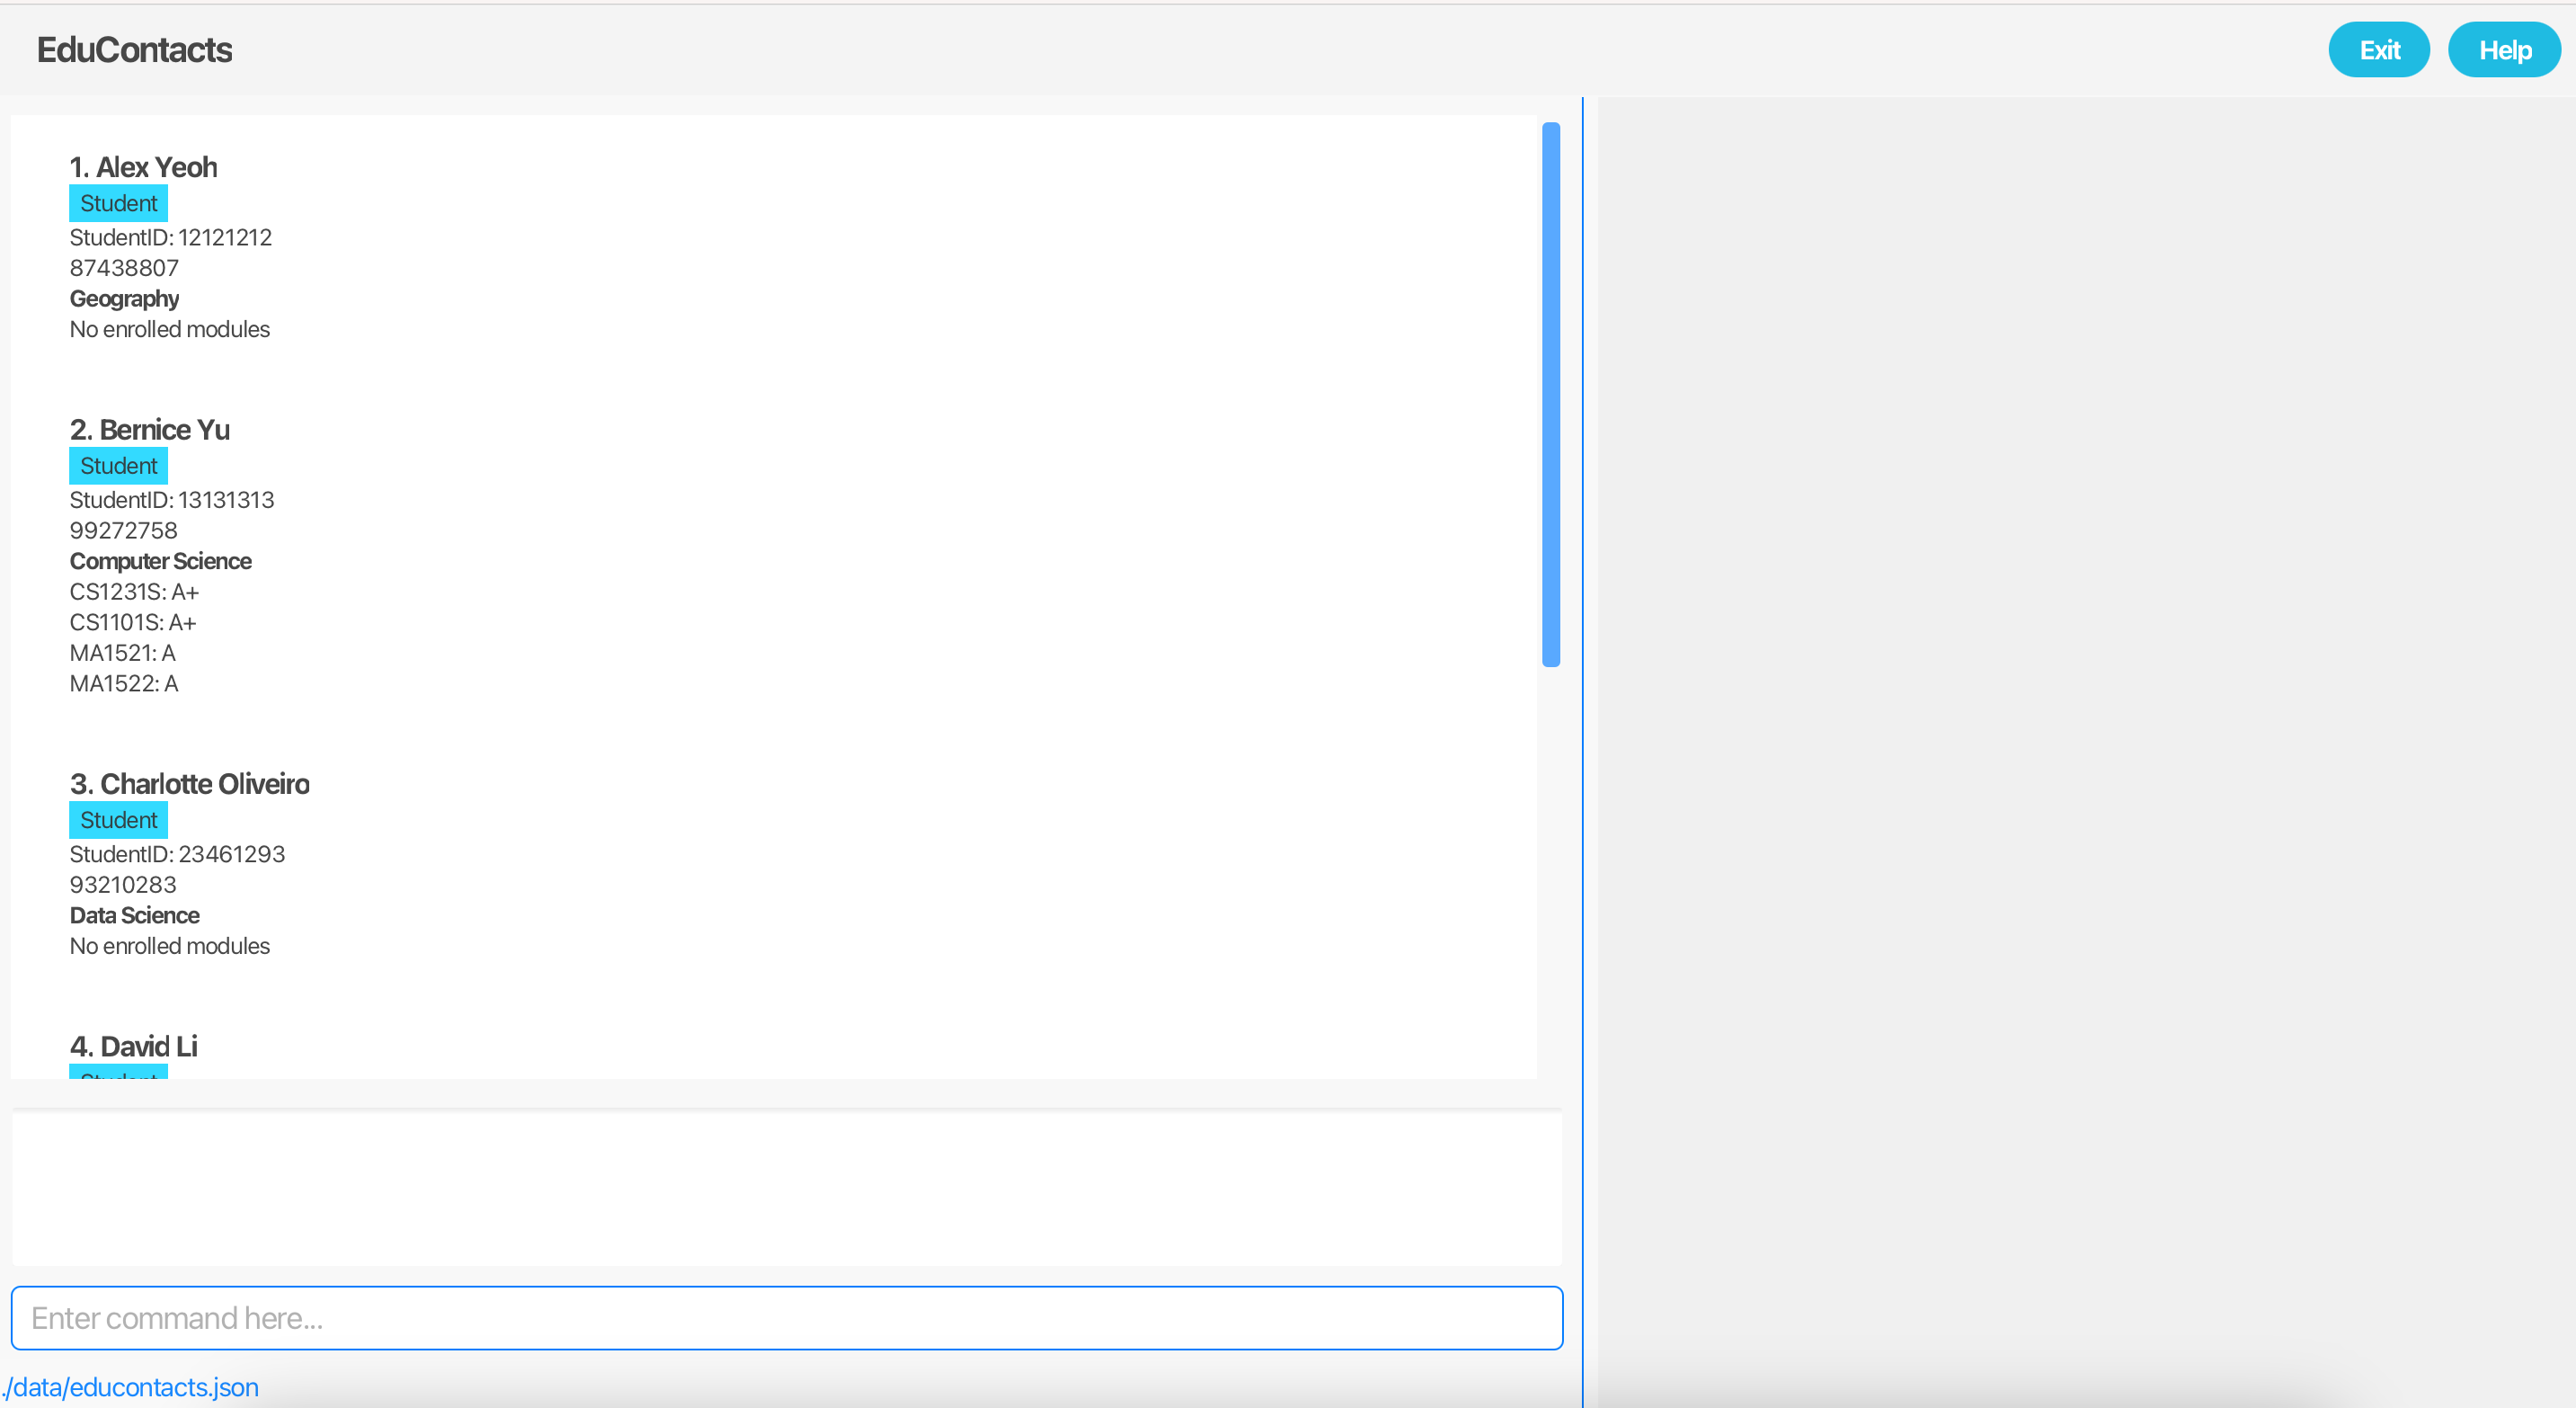
Type the command in the command box and press Enter to execute it. e.g. typing
helpand pressing Enter will open the help window.
Some example commands you can try:listLists all contacts.
add 12345678 n/John Doe p/99999999 e/johndoe@example.com a/123 Jane Doe Road c/Computer Science r/StudentAdds a person named
John Doeto EduContacts.delete 12345678Deletes a person contact with student ID
12345678.clearDeletes all contacts.
Warning:
The clear command will erase all contacts from the system. Please ensure that you have backed up any important information before proceeding. This action cannot be undone, so use this command with caution.
exit
Exits the EduContacts application.
Tip: Use the UP and DOWN arrow keys to scroll through previous commands in the command box. This feature helps you reuse recent commands without retyping, making it faster for you to correct or repeat commands!
- Refer to the Features below for details of each command.
Summary of a Person
This table will explain the fields that a Person in EduContacts possesses and its respective constraints. Each person
in EduContacts is assumed to have a Singapore-based contact. No fields should be left blank when adding a Person to EduContacts, except for Module.
| Field | Details |
|---|---|
| StudentID | The student ID that belongs to the Person. The input for this field can only contain digits and should be exactly 8 digits long. This field also serves as the unique identifier for a Person. |
| Name | The name that belongs to the Person. The input for this field can only contain alphanumeric characters and whitespaces. |
| Course | The course that the Person studies. The input for this field can only contain alphabetical characters and whitespaces. |
The email that belongs to the Person. The input for this field should be of the format local-part@domain. The local-part should only contain alphanumeric characters and these special characters: + _ . - The local-part may not start or end with any special characters. This is followed by a '@' and then a domain name. The domain name is made up of domain labels separated by periods. The domain name must: - End with a domain label at least 2 characters long - Have each domain label start and end with alphanumeric characters - Have each domain label consist of alphanumeric characters, separated only by hyphens, if any. | |
| Address | The address that belongs to the Person. The first character for the input for this field can only contain alphanumeric characters and these special characters: # , -. After the first character, any additional characters are allowed, including whitespace and further text. |
| Phone Number | The phone number that belongs to the Person. The input for this field can only contain digits and must at least be 8 digits long. |
| Module | A module that the Person takes. A Person can have multiple modules. The input for this field can only contain alphanumeric characters. A module can also be assigned a Grade, which must be one of the following: A+, A, A-, B+, B, B-, C+, C, D+, D, F |
| Role | The role assigned to the Person. A person can either be a Student or Tutor. |
Features
Notes about the command format:
All command words should be in lowercase.
Words in
UPPER_CASEare the parameters to be supplied by the user.
e.g. inadd n/NAME,NAMEis a parameter which can be used asadd n/John Doe.Parameters enclosed in square brackets indicate that they are optional.
e.g. infilter n/NAME [m/MODULE],MODULEis a parameter which can be included or omitted as needed.Parameters can be in any order.
e.g. if the command specifiesn/NAME p/PHONE_NUMBER,p/PHONE_NUMBER n/NAMEis also acceptable.Extraneous parameters for commands that do not take in parameters (such as
help,list,exitandclear) will be ignored.
e.g. if the command specifieshelp 123, it will be interpreted ashelp.If you are using a PDF version of this document, be careful when copying and pasting commands that span multiple lines as space characters surrounding line-breaks may be omitted when copied over to the application.
Viewing help : help
Shows a message explaining how to access the help page.
Format:
help
The help window will display the help message as shown in the screenshot below:
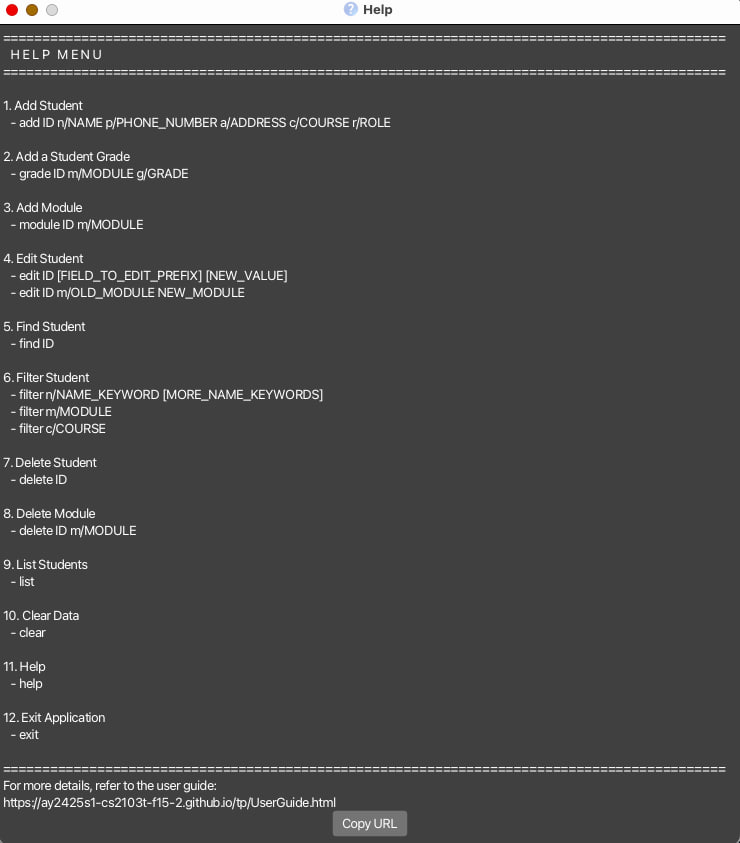
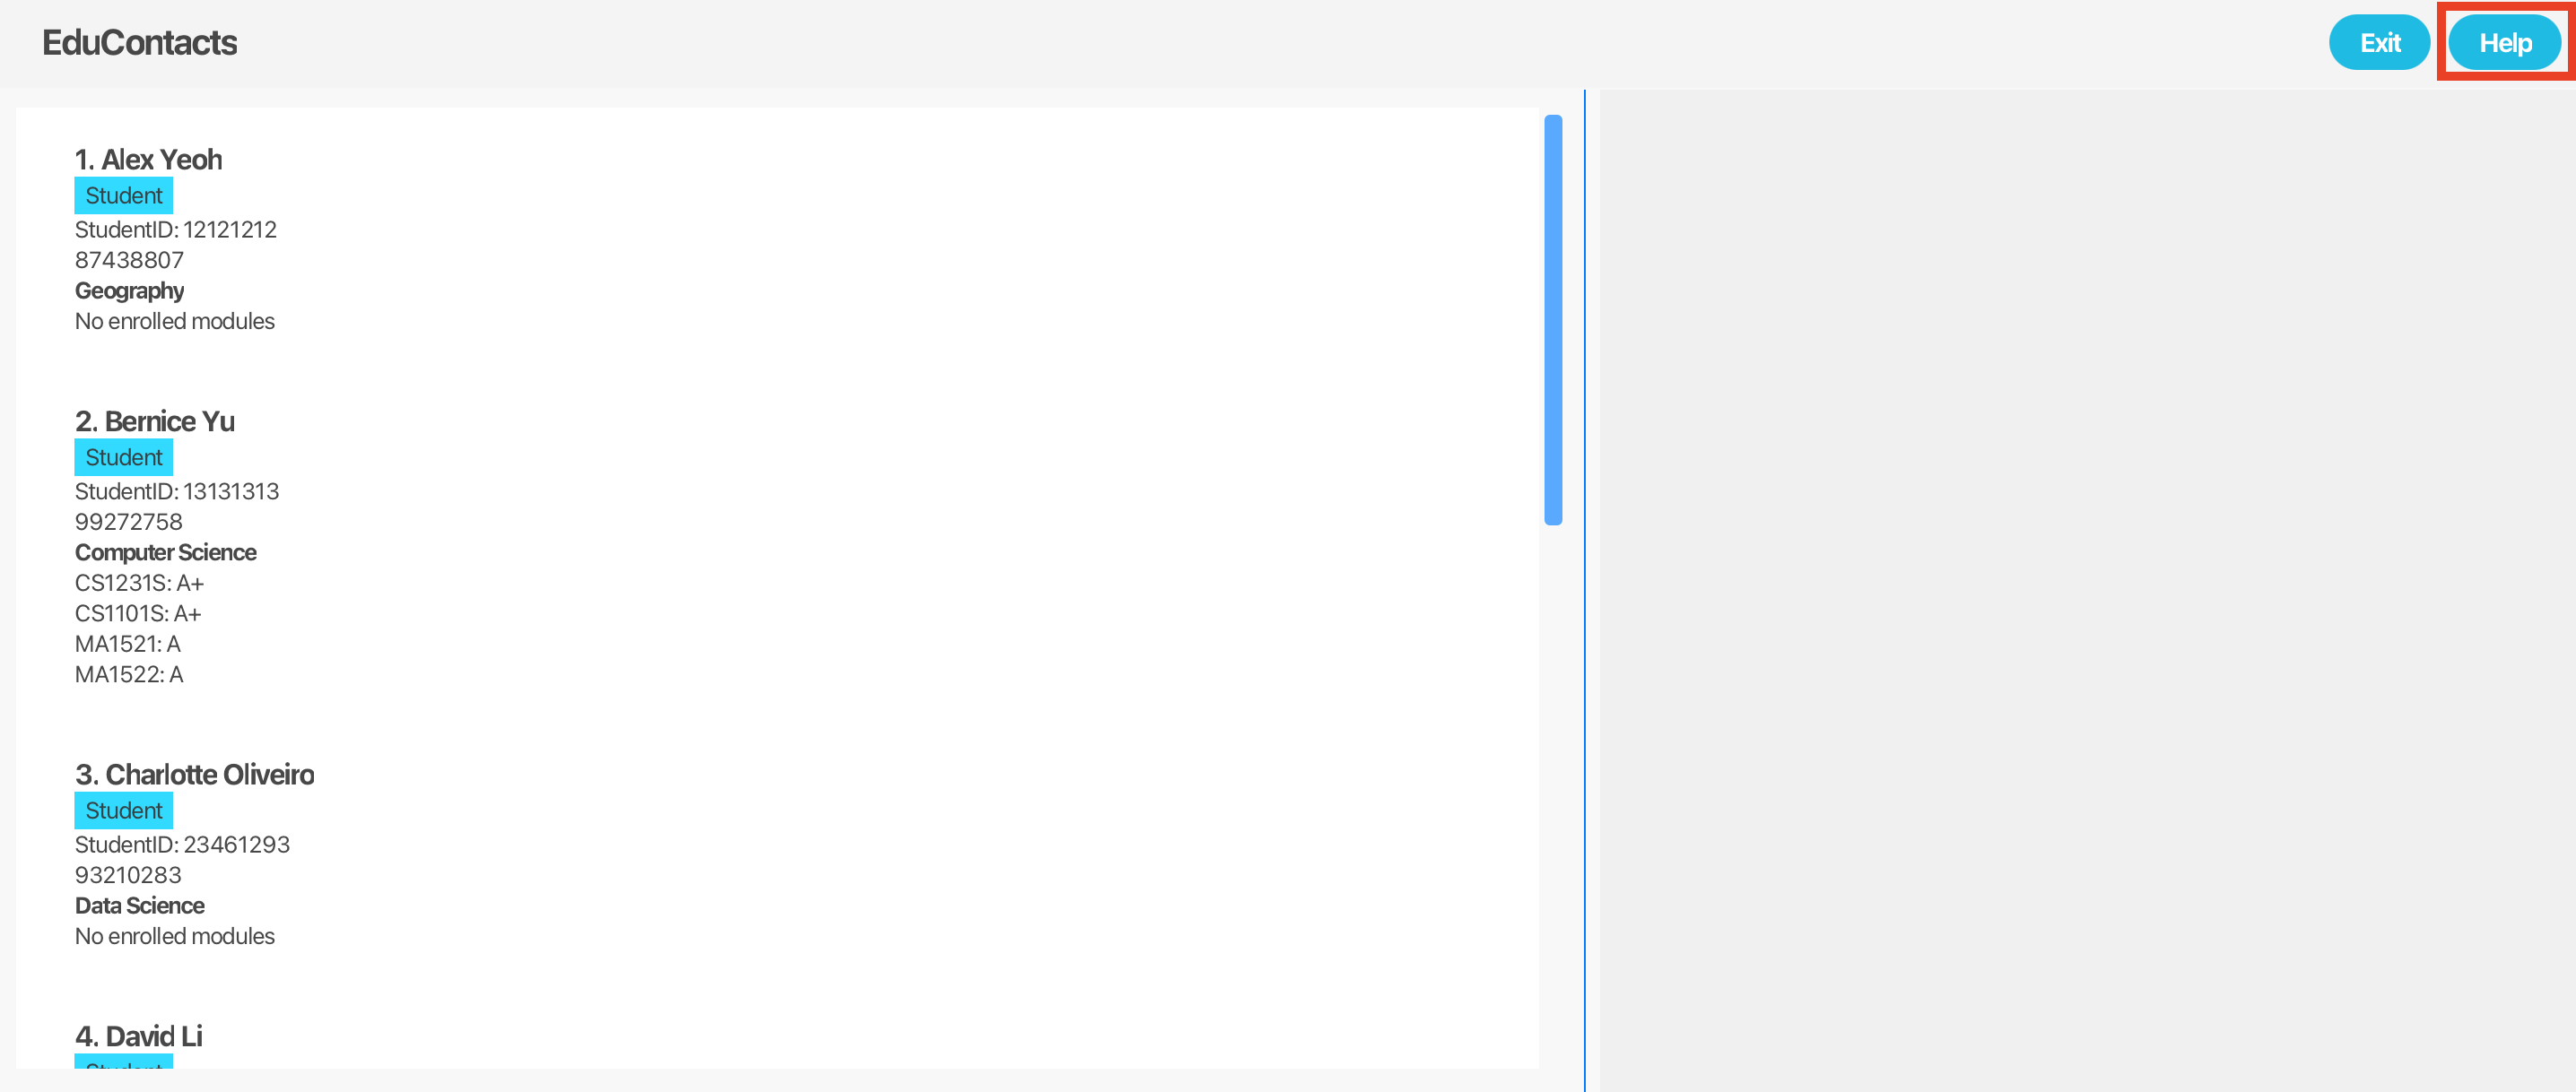
Alternatively, you can click the button on the top right hand corner as indicated here:
Adding a person: add
Adds a person contact to EduContacts.
Format:
add ID n/NAME p/PHONE e/EMAIL a/ADDRESS c/COURSE r/ROLE
When adding a Person to EduContacts, please refer to the table above for the constraints of each field.
Examples:
add 87654321 n/Betsy Crowe r/Student e/betsycrowe@example.com a/Blk 30 Geylang Street 29, #06-40 p/12345678 c/Business Analyticswill add a person namedBetsy Crowewith student ID of87654321to EduContacts.add 12345678 n/John Doe p/98981212 e/johndoe@example.com a/123 Jane Doe Road c/Computer Science r/Studentwill add a person namedJohn Doewith student ID of12345678to EduContacts.add 71271222 n/Benson Boon p/89229191 e/benson@example.com a/Blk 12 Benson Street c/Economics r/Studentwill add a person namedBenson Boonwith student ID of71271222to EduContacts (the response message of this command is shown in the screenshot below).
Listing all persons : list
Shows a list of all persons in EduContacts.
Format:
list
The response message of this command is shown in the screenshot below:

Adding a module to a person: module
Adds a module to a specified person in EduContacts.
Format:
module ID m/MODULE
Examples:
module 12345678 m/GEA1000will add a moduleGEA1000to a person with student ID of12345678.module 13131313 m/CS2103Twill add a moduleCS2103Tto a person with student ID of13131313(the response message of this command is shown in the screenshot below).
Editing a person : edit
Edits a specified person details or module in EduContacts. Usages:
1. Edit person details:
Format:
edit ID [FIELD_TO_EDIT_PREFIX] [NEW_VALUE]
- Updates the details of the person identified by the student ID assigned to the corresponding student.
- At least one of the optional fields must be provided: name, phone, email, address, course, role. Note that student ID cannot be edited as it is the person's identifier.
- Existing values will be overwritten by the input values.
2. Edit person's module:
Format:
edit ID m/ OLD_MODULE NEW_MODULE
- Updates a module of the person identified by the student ID.
- Existing module (
OLD_MODULE) will be overwritten by the input module (NEW_MODULE). - Editing of
NAME,PHONE,EMAIL,ADDRESS,COURSEandROLEusing this format is not supported.
Examples:
edit 12345678 m/CS2103T CS2101will edit a person with student ID of12345678by replacing the old moduleCS2103Twith the new moduleCS2101.edit 12121212 c/Computer Sciencewill edit a person with student ID of12121212by editing their course toComputer Science(the response message of this command is shown in the screenshot below).
Tip: Use the find command to view the full detail of the student first before proceeding with edit. This allows you to view the changes and verify the edit immediately.
Adding a grade : grade
Adds a grade to a person's module.
grade ID m/MODULE g/GRADE
- Adds a grade to a person according to the specified student ID and Module.
- Module specified must exist prior to execution grade command.
- Acceptable grades:
A+, A, A-, B+, B, B-, C+, C, D+, D, F. - Existing grade will be updated to the input grade.
Examples:
grade 23876767 m/CS2103T g/Awill assign anAgrade to theCS2103Tmodule of a person with student ID of23876767.grade 14141414 m/CS1101S g/B+will assign anB+grade to theCS1101Smodule of a person with student ID of14141414.
Listing persons by certain attributes : filter
Filters person contacts by name, course, or module. Usages:
1. Filter by name:
Format:
filter n/KEYWORD [MORE_KEYWORDS]
n/prefix is used.- Only full words will be matched e.g.
Hanwill not matchHans - The order of the keywords does not matter. e.g.
Hans Bowill matchBo Hans - Persons matching at least one keyword will be returned (i.e.
ORsearch). e.g.Hans Bowill returnHans Gruber,Bo Yang
2. Filter by Module:
Format:
filter m/KEYWORD
m/prefix is used.- Only full module codes will be matched, e.g.
m/CS2103Twill match the moduleCS2103T, and notm/CS21."
3. Filter by course:
Format:
filter c/KEYWORD
c/prefix is used.- Partial matching is supported, but the first keyword must match the beginning of the course name.
e.g
Engineerwill match courses like "Engineering" but not "Civil Engineering".
Tip: The search is case-insensitive. e.g cs1231s will match CS1231S.
Examples:
filter n/Johnwill return a list of all persons withJohnin their name e.g.John SmithandJohn Doe.filter m/CS2103Twill return a list of all persons with moduleCS2103T.filter c/Computer Sciencewill return a list of all persons with courseComputer Science.filter n/alex davidwill return a list of all persons withalexordavidin their name e.g.Alex Yeoh,David Li(the result of this command is shown in the screenshot below).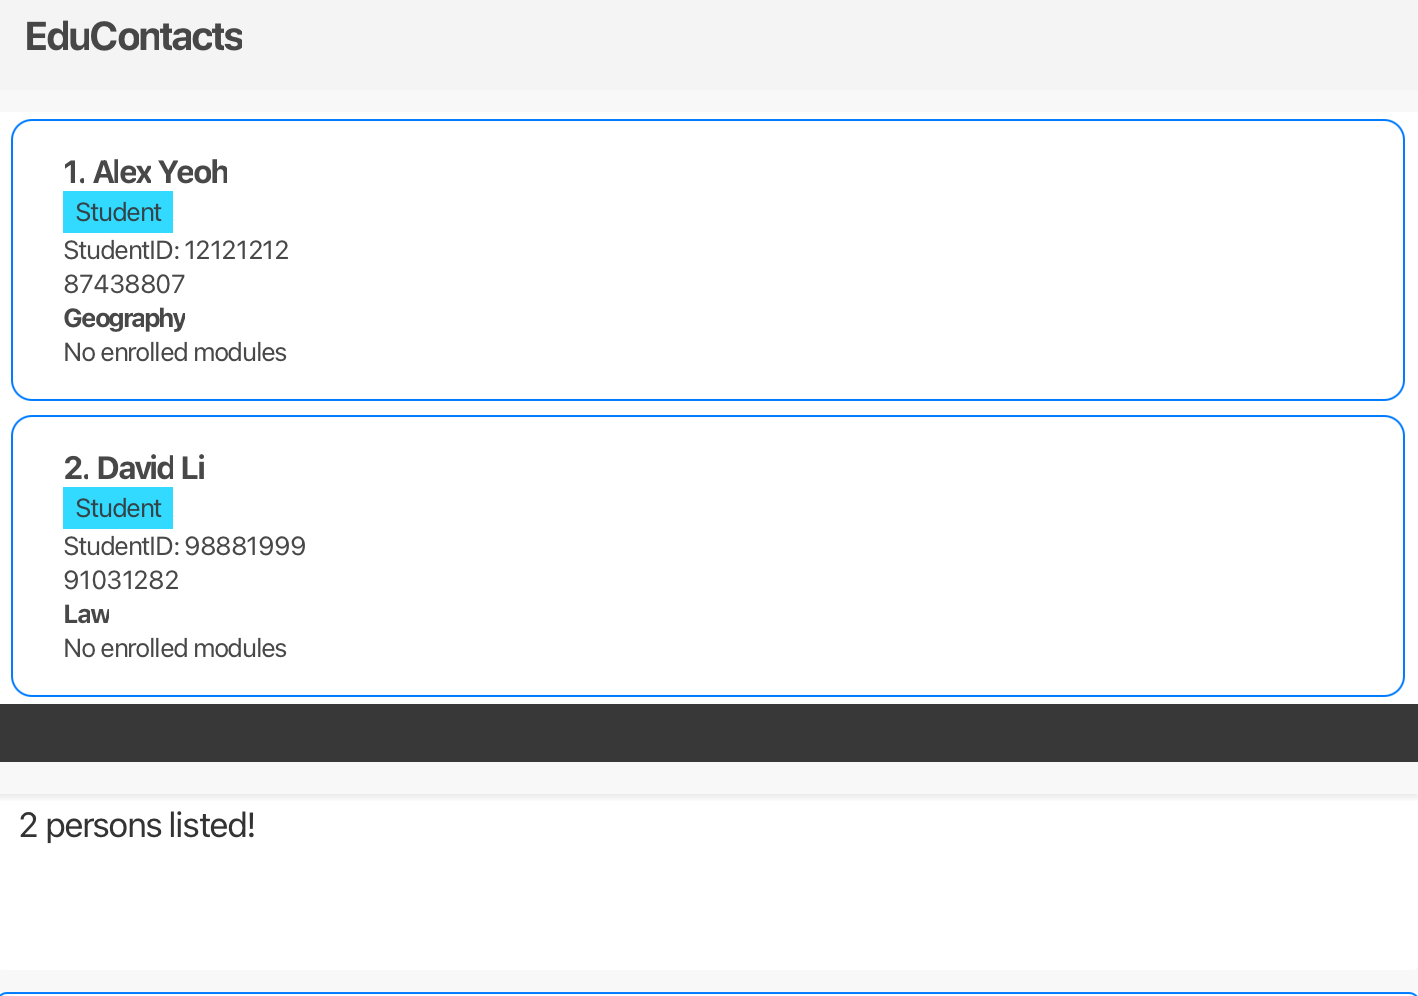
Note: After using filter, only the persons displayed in the filtered list can be edited or deleted, and persons not shown in this truncated list cannot be modified.
To return to display the full list of persons, use the list command.
Deleting a person/module : delete
Deletes the specified person/module from EduContacts. This command has 2 formats.
1. Delete Person from EduContacts
Format:
delete ID
- Deletes person with the specified student ID.
Examples:
delete 15151515will delete a person with student ID of15151515from EduContacts.delete 71271222will delete a person with student ID of71271222from EduContacts (the response message of this command is shown in the screenshot below).
2. Delete Module from Person
Format:
delete ID m/MODULE
- Deletes a module from the person with the specified studentId.
Example:
delete 13131313 m/CS2103Twill delete the moduleCS2103Tfrom a person with student ID of13131313(the result of this command is shown in the screenshot below).
Finding a person : find
Finds the specified person from EduContacts and displays their details.
Format: find ID
- Finds student with the specified
ID.
Examples:
find 12345678will find a person with student ID of12345678and display their details.
Clearing all entries : clear
Clears all entries from EduContacts.
Format:
clear
Warning:
The clear command will erase all contacts from the system. Please ensure that you have backed up any important information before proceeding. This action cannot be undone, so use this command with caution.
Exiting the program : exit
Exits the EduContacts application.
Format:
exit
Saving the data
EduContacts data are saved in the hard disk automatically after any command that changes the data. There is no need to save manually.
Editing the data file
EduContacts data are saved automatically as a JSON file [JAR file location]/data/educontacts.json. Advanced users are welcome to update data directly by editing that data file.
Warning:
If your changes to the data file makes its format invalid, EduContacts will discard all data and start with an empty data file at the next run. Hence, it is recommended to take a backup of the file before editing it.
Furthermore, certain edits can cause the EduContacts to behave in unexpected ways (e.g., if a value entered is outside the acceptable range). Therefore, edit the data file only if you are confident that you can update it correctly.
FAQ
Q: I am unfamiliar with command-line interfaces. How should I begin using EduContacts?
A: We recommend starting with the Quick Start section of the user guide, which provides essential steps for setup and installation. Once you have the application running, utilize the help command or Help button to view a comprehensive list of available commands and their functions. Additionally, the Features section offers detailed instructions and examples for each command. We recommend familiarizing yourself with these resources as it will enhance your experience with EduContacts.
Q: How do I transfer my data to another computer?
A: Install the app in the other computer and overwrite the empty data file it creates with the file that contains the data of your previous EduContacts home folder.
Q: Is there a way to recover accidentally deleted contacts?
A: Unfortunately, once deleted, a contact cannot be recovered unless you have a backup of the JSON file from before deletion. Regular backups are recommended for this reason.
Q: Can I export my contacts to Excel or another format?
A: EduContacts data is stored in JSON format. You can convert JSON files to Excel or CSV using an external tool or script to make data compatible with spreadsheet applications.
Known issues
- When using multiple screens, if you move the application to a secondary screen, and later switch to using only the primary screen, the GUI will open off-screen. The remedy is to delete the
preferences.jsonfile created by the application before running the application again. - For
helpcommand:- If you minimise the Help Window and then run the
helpcommand (or use theHelpmenu, or the keyboard shortcutF1) again, the original Help Window will remain minimized, and no new Help Window will appear. The remedy is to manually restore the minimized Help Window. - On some platforms (especially MacOS), when you use the application in full screen,
running the
helpcommand and closing the popup window repeatedly in quick succession may cause the application to hang or crash. Users have to terminate the application by enteringCTRL+Cin the terminal used to run the application, and run the application again. DATA MIGHT BE LOST. - The development team is working on a more permanent fix for this issue.
- If you minimise the Help Window and then run the
Command summary
| Action | Format, Examples |
|---|---|
| Add | add ID n/NAME p/PHONE e/EMAIL a/ADDRESS c/COURSE r/ROLE e.g., add 12345678 n/John Doe p/99999999 e/johndoe@example.com a/123 Jane Doe Road c/Computer Science r/Student |
| Clear | clear |
| Delete | delete IDe.g., delete 12345678 delete ID m/MODULE e.g., delete 12345678 m/CS2103T |
| Edit | edit ID [n/NAME] [p/PHONE_NUMBER] [e/EMAIL] [a/ADDRESS] [c/COURSE] [r/ROLE]…e.g., edit 12345678 p/91234567 e/johndoe@example.com edit ID m/OLD_MODULE NEW_MODULE e.g. edit 12345678 m/CS1234 CS1231S |
| Add Grade | grade ID m/MODULE g/GRADE e.g. grade 12345678 m/CS2103T g/A |
| Add Module | module ID m/MODULE e.g., module 12345678 m/CS2103T |
| Filter | filter [n/NAME] [c/COURSE] [m/MODULE]e.g., filter n/James Jake |
| Find | find IDe.g., find 12345678 |
| List | list |
| Help | help |